QR Code Event Check-In: How It Works and How to Set It Up

Few things crush the momentum of a corporate event faster than a logjam at the front door. When hundreds of attendees arrive simultaneously, manual guest lists and paper tracking sheets inevitably lead to long lines, frazzled volunteers, and delayed presentations. If your registration desk takes more than a few seconds per person, your lobby will quickly transform into a bottleneck.
A digital QR code check-in system is the most effective way to eliminate these pain points. By replacing slow, manual lookups with a quick digital scan, you can drastically increase processing speeds and create a professional first impression.
In this comprehensive instructional guide, we will walk you through exactly how QR code check-in works, the different deployment models available, and a step-by-step framework to set up an efficient check-in system for your next gathering.
What is QR code event check-in?
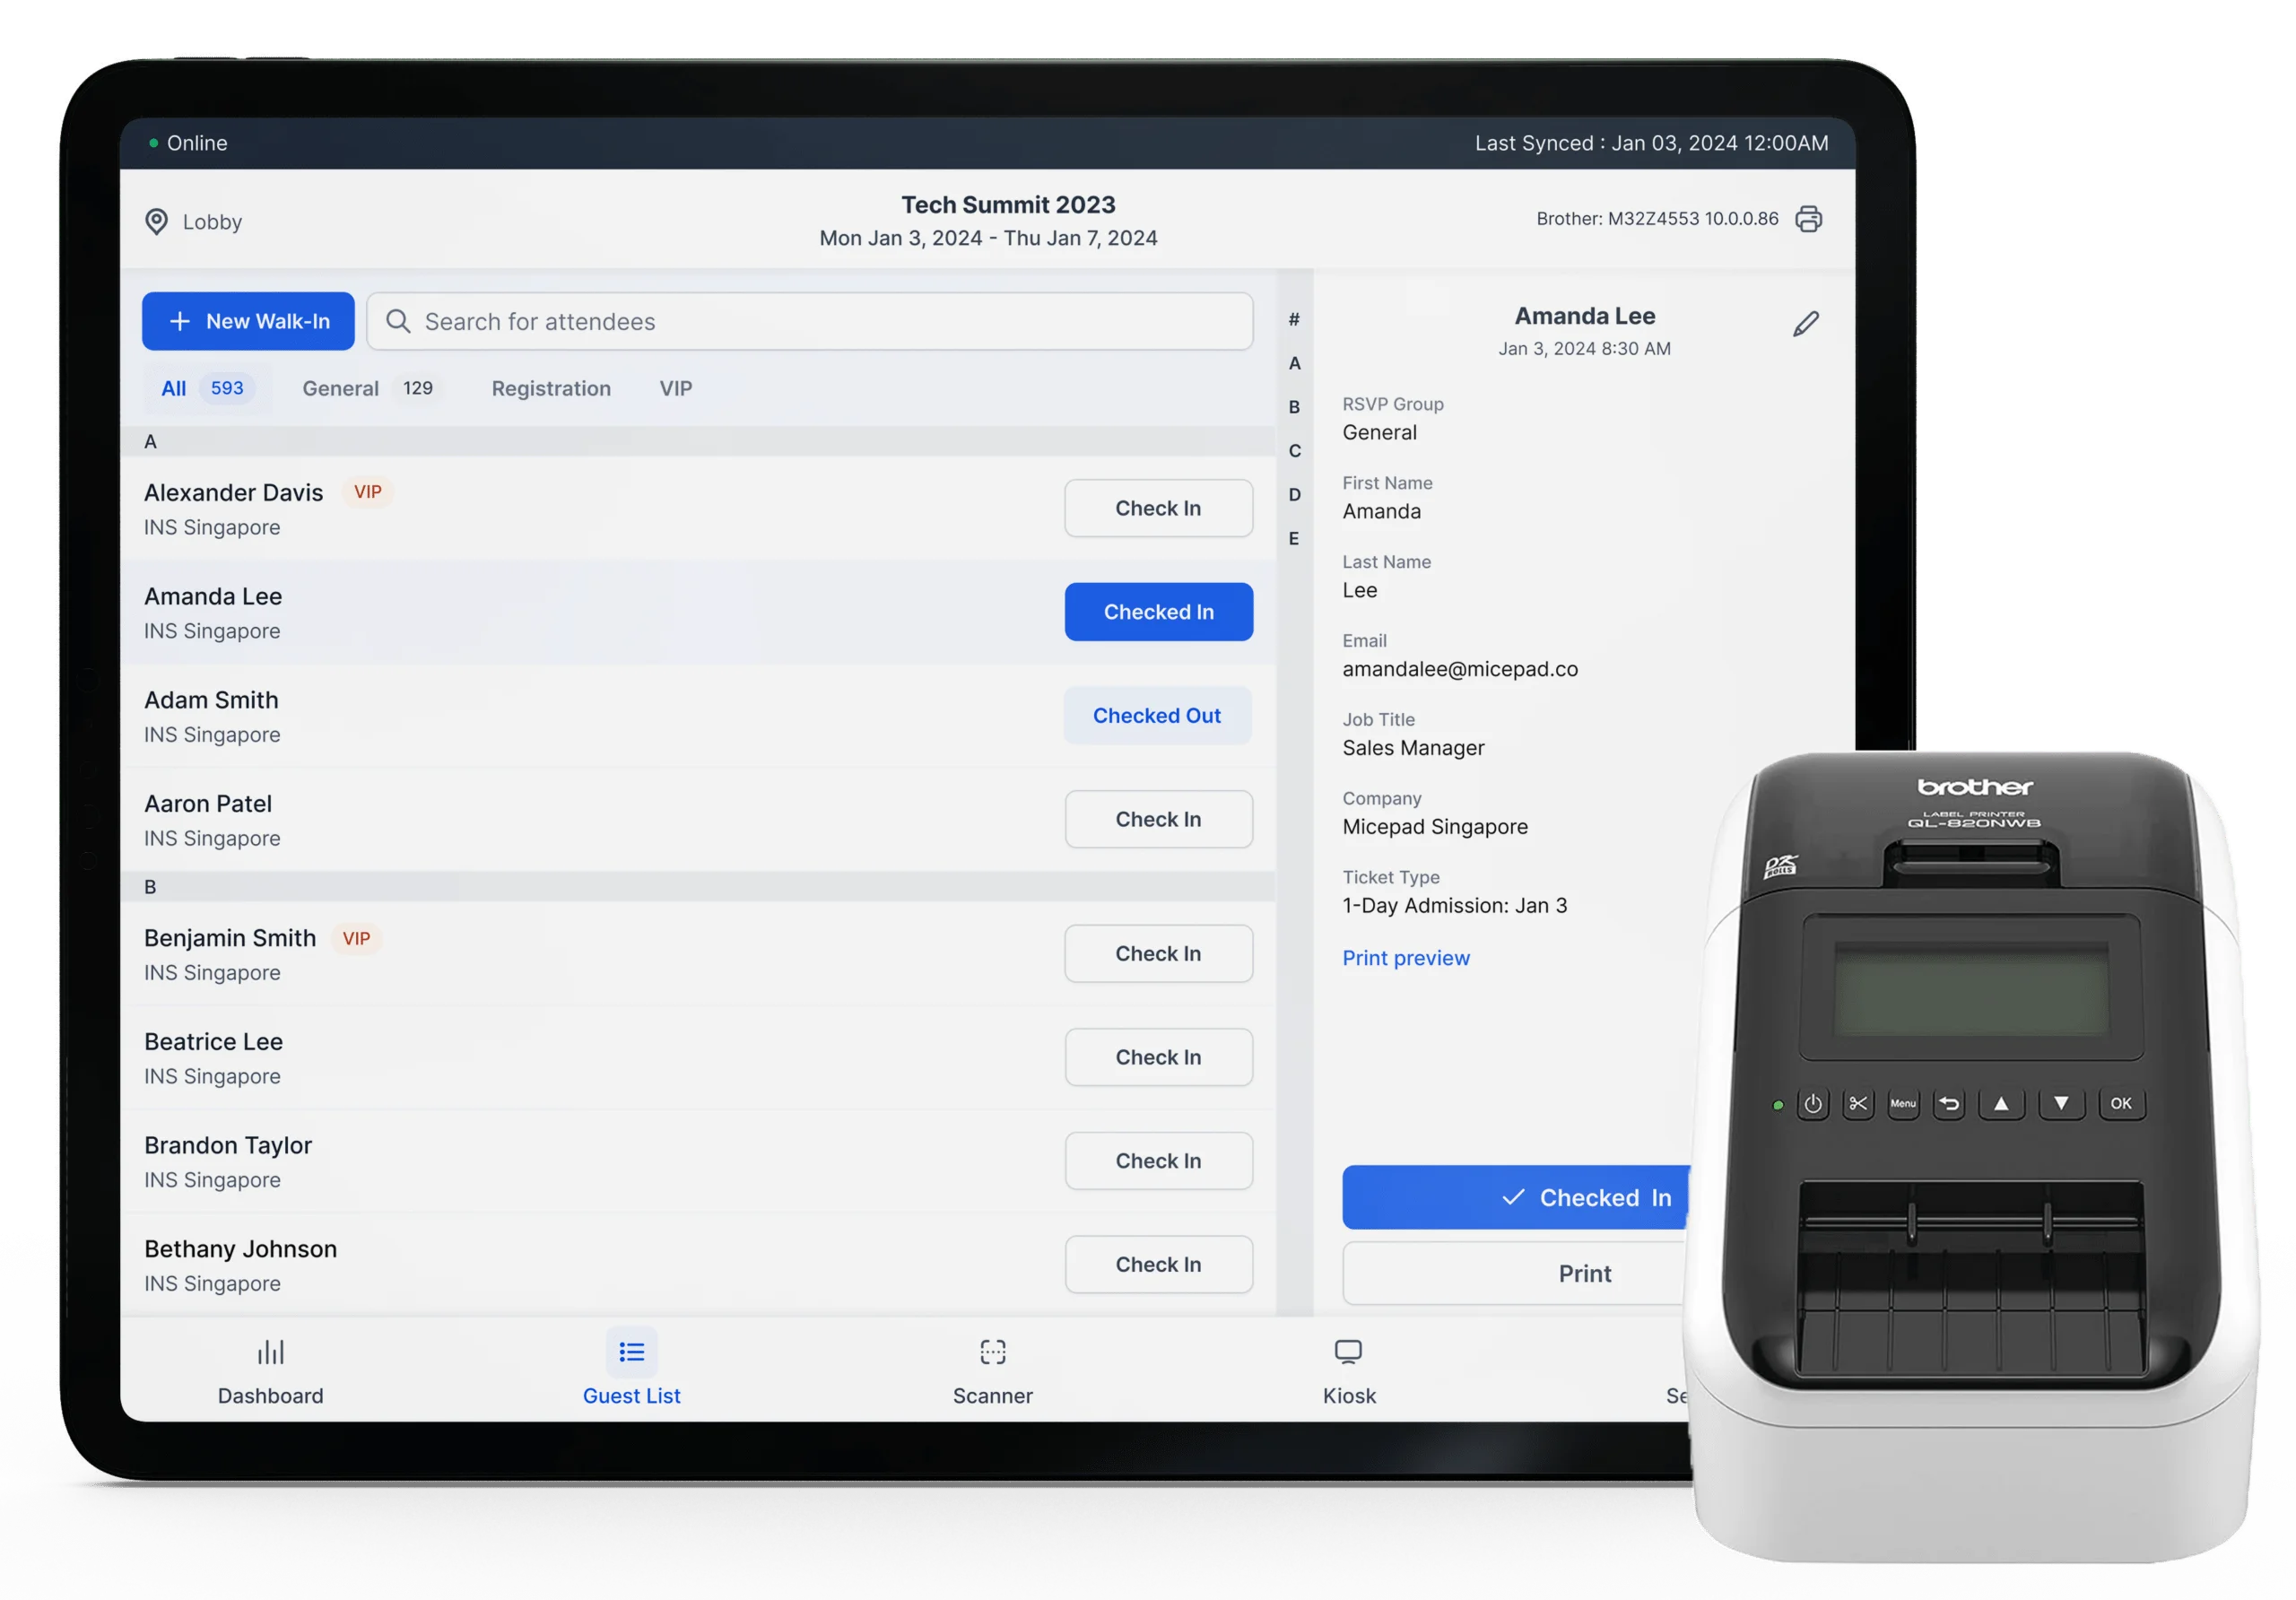
At its core, a QR code event check-in system uses two-dimensional barcodes to instantly match an arriving attendee with their registration data in a central database. Instead of typing out a guest's last name or scrolling through an alphabetized printout, a door staff member simply uses a camera-enabled device to scan a code.
When planning your setup, it is vital to distinguish between the two primary QR models used in the event technology industry, as organizers frequently confuse them:
Model 1: The Unique Attendee Pass (Staff Scans Guest)
This is the standard operational model for professional conferences, trade shows, and ticketed events. Each registered guest receives an individual registration code unique to their profile. When they arrive at the venue, they present this code on their smartphone screen or a printed ticket. Your door staff uses an event app to scan the code, verify the ticket's validity, and check them into the venue. This model provides maximum security, prevents ticket duplication, and allows you to track individual attendance data.
Model 2: The Public Check-In Poster (Guest Scans Code)
In this alternative model, the organizer generates a single, static QR code and prints it onto posters, signs, or flyers placed around the venue lobby. When guests arrive, they use their personal smartphone cameras to scan the poster. This action instantly opens a browser window directing them to a web page where they can enter their own name, fill out a quick registration form, or confirm their arrival. This is a free check-in method because it can be executed with basic web forms, making it ideal for casual meetups, open-house style events, or un-ticketed community gatherings where strict security is not a priority.
How QR code check-in works (step by step)
To successfully implement this technology, it helps to understand the journey of an attendee's data from the moment they sign up to the moment they walk past your security gates. Here is the typical operational flow:
1. The attendee registers online
The process begins when an attendee signs up via your online registration page. They provide their name, company, email address, and any specific preferences (such as dietary restrictions or session tracks).
2. A unique QR code is automatically generated
The moment the registration is confirmed, your event management software assigns a distinct, encrypted alphanumeric string to that specific attendee. The software converts this string into a unique QR graphic. This graphic serves as a digital fingerprint for the guest's ticket.
3. The digital ticket is delivered
The system automatically distributes the digital ticket to the attendee. This is usually managed via a confirmation email, though many platforms also allow guests to download their ticket directly into digital wallet applications, such as Apple Wallet or Google Wallet, for friction-free access on event day.
4. The ticket is scanned at the door
When the attendee approaches the check-in desk, they display the code on their mobile device. A staff member or volunteer opens the event's scanning application on a smartphone or tablet and holds the camera over the code. The app reads the code and pulls up the corresponding attendee profile within seconds.
5. Headcount updates dynamically
As soon as the app marks the attendee as "Checked In," the local device updates. If your devices are connected to the network, this data syncs across all scanning terminals and your master administrator dashboard, providing a live, accurate headcount.
6. Walk-ins are handled instantly
If a guest arrives unregistered, staff can use the same system to register them on the spot. A registration profile is created, a badge is assigned, and they are checked in without requiring them to step out of line or disrupt the main entrance flow.
How to set up QR code check-in for your event
Setting up an automated scanning desk does not require specialized technical expertise or expensive, single-use hardware. You can execute the entire process using standard smartphones or tablets combined with a professional event platform. Follow this step-by-step workflow to configure your system:
Step 1: Import or collect your guest list
Begin by aggregating your attendee data. If you are using an all-in-one event management platform like Micepad, your registration data is already natively integrated. If you used an external registration engine or a standalone ticketing site, export your guest data into a clean CSV or Excel spreadsheet. Ensure that email addresses and full names are separated into distinct columns.
Step 2: Generate your QR codes
Upload your guest list into your chosen event check-in software. The system will automatically process the database and generate a distinct QR code for every individual row. If you are using the public poster model instead, you will generate a single static QR code that links directly to your public check-in web form.
Step 3: Distribute the digital passes
Launch an email broadcast from your system to deliver the passes. The email should feature a clear, high-contrast image of the QR code alongside essential event logistics (start time, venue address, and parking instructions). Include a prominent instruction line telling guests to have the email open or saved to their digital wallet before they reach the front desk.
Step 4: Choose and prepare your scanning devices
You do not need to buy industrial hardware. Modern event check-in apps run on standard iOS and Android smartphones or tablets. Download the organizer side of your check-in app onto all devices that will be used at the entrance. Ensure the devices are fully charged and that the physical camera lenses are clean and free of smudges.
Step 5: Configure multi-device syncing
Log into the coordinator app on all scanning devices using your organizer credentials. Verify that all devices are assigned to the correct event and are communicating with the same master database. This multi-device synchronization is critical; it ensures that if an attendee enters through Door A, their ticket cannot be passed to a friend and scanned again at Door B.
Step 6: Enable offline mode capability
Before the doors open, check your platform's network and synchronization settings. Premium platforms offer an automated offline mode that caches your entire attendee database locally onto the device. Ensure this feature is active so that your entry gates continue to function even if the venue's local Wi-Fi connection drops unexpectedly during peak hours.
Step 7: Conduct a live field test
Never open the doors without running a trial. Create a handful of dummy attendee profiles and send the test QR codes to your own phone. Practice scanning the codes under different lighting conditions, check how quickly the data registers, and make sure your volunteers are comfortable handling basic errors or lookups.
QR code check-in best practices
While the technology behind digital scanning is highly efficient, human logistics can still introduce delays. To ensure your entry desks operate at peak performance, incorporate these operational best practices into your venue layout:
Establish distinct lanes: Avoid funneling all attendees into a single unorganized crowd. Divide your entry area into clearly marked lanes using stanchions or signage.
Create an express lane for pre-checked guests: Dedicate specific lanes exclusively for attendees who already have their digital QR passes visible on their screens. This rewards prepared guests with near-instant entry and keeps the main line moving.
Deploy a dedicated help desk: Set up a separate service table away from the main scanning lanes. If a guest cannot find their email, has a billing dispute, or requires manual profile updates, send them to the help desk immediately so they do not stall the main line.
Use clear on-site signage: Place large, highly visible signs at the venue entrance and along the approach corridors. Use clear copy such as: "Please have your QR code ready on your screen for scanning." If you are using a public poster check-in model, place these signs on heavy floor stands where people naturally congregate.
Brief and train staff thoroughly: Spend a few minutes before the doors open training your volunteers. Teach them how to hold the device relative to the attendee's phone (roughly a hand's width away), how to read successful validation screens, and exactly when to redirect a guest to the help desk.
Tip on screen brightness: A common cause of slow QR scanning on-site is low screen brightness on attendees' smartphones. Instruct your door staff to politely ask guests to turn up their phone brightness if a code fails to read quickly.
Common problems and how to avoid them
Live events are unpredictable. Understanding where the check-in process typically encounters friction allows you to prepare contingencies well in advance.
Problem 1: Sudden Wi-Fi failure
Venues often promise robust internet connections, but when thousands of attendees enter a localized space and connect their personal devices simultaneously, local cellular towers and Wi-Fi routers can easily become overwhelmed and drop connections.
- The fix: Ensure your check-in tool supports an uninterrupted offline caching mode. Platforms like Micepad pre-load the guest list onto the scanning device's local memory, allowing staff to scan, validate, and check in guests without active internet. The data then syncs back to the cloud database once a connection is re-established.
Problem 2: Duplicate ticket scans
An attendee might accidentally or intentionally share their registration ticket with a colleague, resulting in multiple people attempting to enter using the exact same ticket data.
- The fix: Your scanning software must feature automatic deduplication alerts. When a code is scanned a second time, the screen should immediately display a high-contrast warning indicating that the ticket has already been used, along with a timestamp of the original check-in.
Problem 3: Missing or lost QR codes
A percentage of your guest list will arrive at the door unable to locate their confirmation email, facing a dead phone battery, or lacking cellular service to download their pass.
- The fix: Never use an app that only functions via camera scanning. Your entry app must include a fast manual search override. Door staff should be able to type the first few letters of an attendee's last name into a search bar to locate their profile, verify their status, and complete the check-in manually within seconds.
Problem 4: Printed pass quality
While most corporate attendees prefer digital passes, some guests will print their confirmation emails on standard paper. Low-quality home printers can leave streaks, and wrinkled paper can distort the barcode shape.
- The fix: Instruct your team to flatten wrinkled paper passes against a clipboard or table surface. If the camera still fails to recognize the barcode pattern, immediately bypass the scanner and use the manual name lookup tool to avoid delaying the line.
Event check-in FAQs
Can guests check in without downloading an app?
Yes. Attendees do not need to download any specialized applications to use a unique QR pass. The QR code arrives as an image inside a standard confirmation email or as a pass added to their native digital wallet. The only people who need to download and install an operational app are the event organizers and the staff managing the doors.
Do I need internet or Wi-Fi for QR check-in to work?
It depends entirely on the event technology software you select. Basic, web-browser-based forms or lightweight ticket utilities require a continuous internet connection to reach their servers. However, professional-grade tools offer offline mode functionality, allowing you to scan and check in guests with zero network connectivity.
How do I create QR codes for an event?
You do not need to generate them individually or use consumer barcode makers. When you use an event management platform, the system handles generation automatically. Once you upload your registration database or collect sign-ups via your integrated landing page, the platform pairs each profile with an automatically generated barcode and embeds it into their confirmation materials.
Is QR code check-in free?
For small events, you can often use a professional platform's free tier. Micepad, for example, offers a free tier that includes check-in capabilities for smaller events — confirm the current attendee cap on the Micepad pricing page before you rely on it. For larger public gatherings, casual check-ins can be managed for free by using a static public poster that links to a basic web form, though this method lacks security and badge-printing features.
Can multiple staff members scan at the same time?
Yes, provided you are using a system with cloud-based database synchronization. You can distribute the check-in workload across many devices simultaneously. As long as the scanning devices have an internet connection, they will update a shared database in real time, ensuring an accurate headcount and preventing duplicate ticket entries across different gates.
Designing a frictionless entry experience
Implementing an automated entry system is one of the most impactful operational upgrades you can make for your event. By shifting away from manual lists and transitioning to a streamlined digital workflow, you significantly reduce wait times, maximize data accuracy, and allow your staff to focus on welcoming guests rather than managing logistics.
If you are currently evaluating options to manage your next front-door experience, explore how Micepad streamlines this process. The platform offers an offline-capable check-in workflow built for high-volume corporate events. To go deeper, read our best event check-in apps review for a side-by-side comparison, browse our event check-in tips for live operations, or see our free check-in apps guide for smaller gatherings.
When you are ready to build out your next registration flow, you can explore the Micepad check-in product page or learn how to scale into automated entry terminals with our self-service kiosk page. You can also sign up and build your first event for a small gathering completely free by visiting studio.micepad.co/sign_up.
Run faster check-in at your next event
2.8s avg check-in, offline mode, Zebra + Brother printer support — free up to 50 attendees.